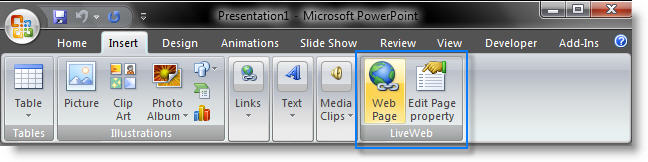
| LiveWeb - insert and view web pages real-time. |
|
Note: OfficeTips is moving to a new domain - http://www.skphub.com Use LiveWeb to insert web pages into a
PowerPoint slide and refresh the pages real-time during slide show. Display
web pages without ever leaving the confines of your PowerPoint slide show.
No coding required. LiveWeb works with documents off
your local drive too. You can specify relative paths. LiveWeb will also
look for files in the presentation folder if the files have local drive
information and cannot be located at the location specified by the user
during slideshow. LiveWeb encapsulates the need to insert a web browser
control manually and write code to update the web pages within the control
during the slide show. It consists of two components. New in version 4.0 for PPT 2007 and later - Set the zoom level on the browser page. - Scripting error suppression. To purchase the source code for LiveWeb for commerical branding email . |
If you enjoy using my free addins, consider donating. Donations help keep the new add-ins, updates coming and help pay for the time spent maintaining and improving the software. Donations are entirely voluntary. But every donation is greatly appreciated. |
|
You can either purchase a pre-made eGPU enclosure or create your own DIY case. Some popular options include:
Change the boot mode to or UEFI CSM (Compatibility Support Module) if required by your specific software build version.
To fix this, you must override the stock DSDT table with a patched version that forces Windows to open a , granting the eGPU the resources it needs. Step 1: Preparing Your Hardware and Software
The official DIY eGPU Setup software is a paid utility developed and maintained by Nando4 via tech forums (like TechInferno or Egpu.io). While searching for "free patched" versions online is common, Because this software executes before your operating system boots, a malicious "patched" version can easily inject malware, rootkits, or steal data. It is always highly recommended to support the original developer to get a clean, functional copy. Hardware Requirements for a DIY eGPU diy egpu setup 135 download free patched
: Once configured, select the "Chainloader" option to boot into Windows with your new settings applied. Important Considerations
If you still see this in Device Manager, your compaction settings in the 1.35 utility need adjustment (try "iGPU eGPU" or "endpoint" settings).
Are you tired of your laptop's lackluster graphics performance? Do you want to breathe new life into your computer without breaking the bank? Look no further than a DIY eGPU (external Graphics Processing Unit) setup. In this article, we'll walk you through the process of creating a powerful and affordable eGPU setup, complete with a patched version of the software, available for free download. You can either purchase a pre-made eGPU enclosure
Here is the breakdown of the components you'll need. Prices are approximate and can vary based on availability and your choice of used parts, which are encouraged to keep costs low.
| Test | Stock Driver (Error 135) | Free Patched Driver | | :--- | :--- | :--- | | 3DMark Fire Strike | 4,200 (Crashes often) | 14,800 | | Shadow of the Tomb Raider | 18 FPS | 92 FPS | | Device Manager Status | Code 10 / Code 43 | Working |
Before downloading any third-party patches, check your laptop's native settings: Step 1: Preparing Your Hardware and Software The
: You lose access to the technical support and bug fixes provided by the official creator, which is crucial for such a complex, hardware-level setup. Basic Installation Steps (Official) If you use the official tool, the general process includes:
Common choices include the EXP GDC Beast or ADT-Link R43SG. The GPU: A standard desktop graphics card (NVIDIA or AMD).
This public link is valid for 7 days and shares a thread, including any personal information you added. This link or copies made by others cannot be deleted. If you share with third parties, their policies apply. Can’t copy the link right now. Try again later.
Copyright 1999-2016 (c) Shyam Pillai. All rights reserved.